Outbound shipment page by page - Pick

IN THIS ARTICLE
Introduction to the Pick Page
The pick stage is critical due to its impact on the quantity available. Inventory becomes committed when the user arrives on this page and the pick takes place. That is, as soon as the page opens, lots have been automatically selected by OpenBoxes and will not be available for other transactions. This will be taken into account immediately and can be seen elsewhere in OpenBoxes where the quantity available is listed, such as an item stock card or in the stock transfer workflow. If the user edits the pick, the quantity available will be updated accordingly.
Getting Started
The pick page is one of the most detailed segments of the outbound stock movement workflow. This is the part of the process where we note the specific lot, expiry information, and bin location for the items in our shipment.
Autopick
OpenBoxes will automatically generate the lots to be selected for a shipment. The system will allocate the first expiring lot. Given the same expiration date, the system will choose to pick from the bin with the smallest quantity first.
Once the pick takes place, quantity available for the item will be impacted throughout OpenBoxes.

Review the pick to make sure it matches your expectations. If you have to edit the pick for any item, you can do so by clicking the “Pick” button under the Pick column for each line item.

Editing the Pick
After choosing to edit the pick, you will be taken to a modal where you can manually make changes. Here you can see the original lots and bin locations selected.

Below, I edited the pick and instead instructed OpenBoxes to pull 50 of a different Lot #. After making changes to select inventory from your desired lot or bin location, hit the ‘Save’ button to go back to the Pick Page.

Once we return to the Pick Page, you will see that the original line is now crossed out and replaced by the new lot and/or bin location that we just selected. It’s important to note that the new lot is now committed to this stock movement. It will not be available for other transactions.

Import Pick
For multiple lines of items, you can also choose to import Picks. This allows users to add the desired Lots and Bin Locations for each item in an excel file and then import them into the system. See instructions below:
-
First, Click on Export > Export Pick. The downloaded file will include the already existing Picks for the shipment.
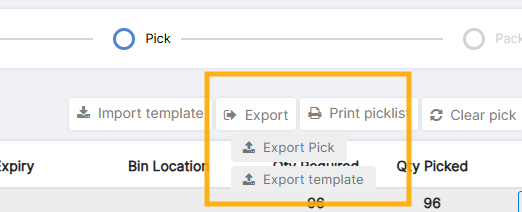
Export options in Pick Page - Open the Downloaded Excel file and enter information.

- Columns A to C will auto-populate.
- Quantity to Pick (Column G): is auto-populated with the quantity you entered on the "Edit Page" of the Outbound Movement.
- Serial/Lot Number (Column D):
- Enter the Lot Number for the item.
- You can also change the Lot Number or Bin Location information for lines with existing information.
- Expiration Date (Column E) (Optional): OpenBoxes will auto-pull the Expiration Date associated with the entered Lot Number from the system.
-
Bin Location (Column F): Enter the Bin Location for the Lot Number that you want to pick.
If the same Lot Number is in multiple Bin Locations, enter the Bin Location in the excel file.
If stock is in Receiving, Default, or Hold Bins, OpenBoxes auto-select the Bin location. See the yellow box below to see how OpenBoxes makes selections:
Important information on how OpenBoxes matches Lot # to Bin Locations
- OpenBoxes will ignore Lot Numbers placed in Hold Bins.
- If the same Lot Number is in multiple Receiving Bins, OpenBoxes will pick the Receiving Bin with the fewest items.
- If all stock is in Default Bin, OpenBoxes will pick from the Default Bin.
- If you want to pick multiple Lot Numbers, add a new row, Copy and Paste the ID, Code, and Name into the new row. Add the desired Lot #, Expiration Date, and Bin Location in the new row.
- Go back to OpenBoxes, Click on Import Template. If the imported file has valid Lot # and Bin Locations, you will see your picked selections on the Pick Page.
Undo Edit
Click this button if you would like to undo the manual edits that were made and revert to the previous pick for a particular item.

Redo AutoPick
Similar to the reload process on the Edit Page, which gives users the ability to refresh inventory information, the Pick Page also has a reload function. Selecting this button will make OpenBoxes refresh the autopick. This can be particularly useful if changes have occurred at the item or lot level that could impact the current pick, or if users have set aside their work and are returning to it at a later time. The system will automatically refresh the pick based on current inventory availability.

Print Picklist
OpenBoxes enables users to easily print a picklist for their outbound stock movement.
Once the picks have been finalized, users can print the picklist to provide to warehouse team members to pull the appropriate items, lots, and quantities from inventory.

Users can additionally choose to organize their products list by Bin Location using the "Sort by bin" button on the far right-hand side.

Clear Pick
Read this article for detailed information on Clear Pick: Update Pick for Shipments.
Adjust Stock
This functionality is not currently active in OpenBoxes.
Next
Once you have verified that all of the lots and bins are correct, press ‘Next’ to go to the following page. Depending on your location’s settings, this will be the pack page or the send page. If the pack page is not enabled in your location, skip the next part of this series and advance to the send page.

Maintenance of Outbound Stock Movements
Because the pick stage impacts the quantity available, it's important to regularly manage and maintain your outbound stock movements.
Once an outbound stock movement is picked, the product will not be available for other transactions. Therefore, it's very important to regularly review outbound stock movements and delete any unnecessary movements that will not be issued. Otherwise, your quantity available may not be accurate or you may be prevented from fulfilling other requisitions.