Updating Pick for Shipments (Clear Pick)
IN THIS ARTICLE
- Introduction to the "Clear Pick" feature
- When to use "Clear Pick" feature
- Updating Pick for Shipments
- Possible Errors during Pick Import
- I want OpenBoxes to auto-pick for a shipment. What do I do?
- Important to Know regarding Updating Pick
Introduction to the "Clear Pick" feature
You may have noticed during the Pick step of an Outbound Movement, OpenBoxes automatically picks lot numbers and Bin Locations for your items based on the earliest expiring dates. This is helpful so you can print the picklist and go pick out the items from their storage area. However, there are also instances where you may have already picked the items or even shipped out the shipment before entering it into OpenBoxes. It may have been due to an internet outage, or an emergency request. In such cases, OpenBoxes' s auto-pick feature adds more work to manually edit the pick for each item in the shipment.
Therefore, if you are entering a Shipment in Openboxes that the warehouse has already shipped out or if the items have already been picked, you can use the "Clear Pick" feature to remove OpenBoxes' s auto-pick. Then, you can choose to manually pick Lot #s and Bin Locations for each item manually or Import picks for multiple items.
When to Use "Clear Pick"
"Clear Pick" allows users to remove Lot# and Bin Locations auto-picked by OpenBoxes. Then, they can select Lot# and Bin Locations of their choice. This can be helpful in scenarios such as below:
- You are entering a shipment into OpenBoxes that has already been shipped out, i.e. the Lot # and Bins for items were picked before the shipment was entered into OpenBoxes.
- The team has picked Lot# for products already before entering it into OpenBoxes.
- You don't want First Expiring items for a shipment and need to pick lot # with other expiration dates.
- You need to pick items different from what OpenBoxes has auto-picked.
Updating Pick for Shipments
Clear Auto-picked Selections
Please see Outbound Shipment documents in the Knowledge Base for steps before the Pick Step.
On the Pick Step:
-
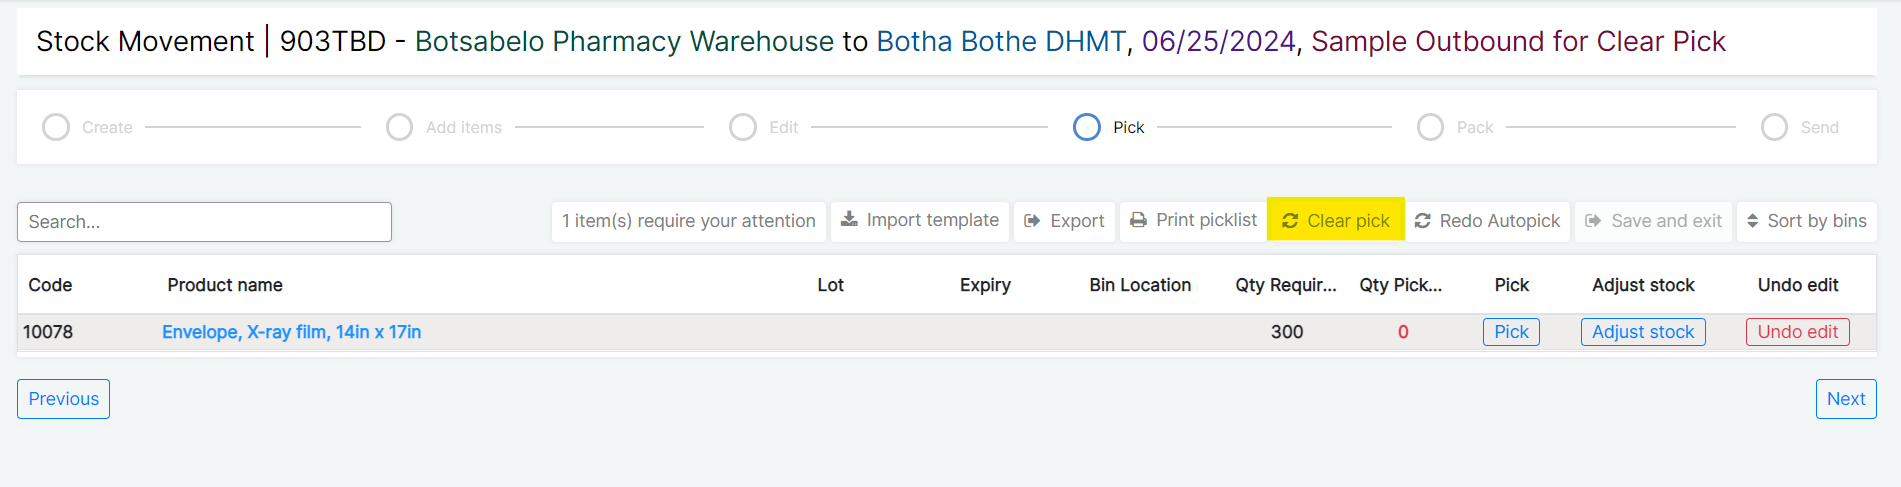
Click on the "Clear Pick" button to remove auto-picked Lot #s.

Clear Pick button on Pick Page
-
OpenBoxes will ask for validation that you want to proceed.

Clear Pick Validation -
After you read the validation message, confirm that you want to proceed. The auto-picked selections (Lot, Expiry, and Bin Location) will be cleared out.

Auto-picked selection cleared out


Note: The Lot #s that OpenBoxes had initially auto-picked now become unreserved. You will have to Pick or reserve Lot #s. See how in the next section: Complete Pick.
Complete Pick
After you clear the auto-picked selections for a shipment, you can pick Lot #s for the shipment items yourself in two ways:
- Manually Pick for each item
- Import Pick for multiple items
IMPORTANT
After you "Clear Pick," make sure to complete Pick for all the items in the shipment. Leaving some lines not picked will cause issues with product availability.
Complete Pick for ALL lines and proceed to the Send Page immediately.
Manually Pick for Each Item
-
For each line item, click on Pick under the Pick Column.

-
The Pick Modal will appear.
Here, you will see all the Lot Numbers available to select from. Enter the quantity you need to select under the Picked column. Click on Save.

-
Now, you will see your Lot selection in the Pick Page. Complete this for rest of the line items.

-
Beside the Search Bar, you can see how many items are remaining to Pick for.


Import Pick for Multiple Items
-
First, Click on Export > Export Template. The downloaded file will have empty Lot, Expiration date, and Bin Locations to allow you to enter information for ALL the lines.

Export Options in Pick Page Open the Downloaded Excel file and enter information.

Downloaded Import Template - Columns A to C will be auto-populated.
- Quantity to Pick (Column G): is auto-populated with the quantity you entered on the "Edit Page" of the Outbound Movement.
- Serial/Lot Number (Column D): Enter the Lot Number for the item.
-
Expiration Date (Column E) (Depends):
If you enter a Lot number, OpenBoxes will auto-pull the Expiration Date associated with the entered Lot Number from the system.
If your item has stock with no lots, leave the expiration date empty.
-
Bin Location (Column F): Enter the Bin Location for the Lot Number that you want to pick.
If the same Lot Number is in multiple Bin Locations, enter the Bin Location in the excel file.
If stock is in Receiving, Default, or Hold Bins, OpenBoxes auto-select the Bin location. See the yellow box below to see how OpenBoxes makes selections:
Important information on how OpenBoxes matches Lot # to Bin Locations
- OpenBoxes will ignore Lot Numbers placed in Hold Bins.
- If the same Lot Number is in multiple Receiving Bins, OpenBoxes will pick the Receiving Bin with the fewest items.
- If all stock is in Default Bin, leave the Bin Location blank. OpenBoxes will pick from the Default Bin.
- If you want to pick multiple Lot Numbers, add a new row, Copy and Paste the ID, Code, and Name into the new row. Add the desired Lot #, Expiration Date, and Bin Location in the new row. The Quantity to Pick must match the Revised quantity selected in the Edit step.
- Go back to OpenBoxes, Click on Import Template. If the imported file has valid Lot # and Bin Locations, you will see your picked selections on the Pick Page.


Edit Pick using Pick Import
If you have lines with existing pick, you can still use Import Pick function to update the existing picks or add new picks.
-
First, Click on Export > Export Pick. The downloaded file will include the already existing Picks for the shipment.
Export Options in Pick Page Open the Downloaded Excel file and enter information.

Downloaded Import Template with existing Pick information - Columns A to C will be auto-populated.
- Quantity to Pick (Column G): is auto-populated with the quantity you entered on the "Edit Page" of the Outbound Movement.
- Serial/Lot Number (Column D):
- Enter the Lot Number for the item.
- You can also change the Lot Number or Bin Location information for lines with existing information.
- Expiration Date (Column E) (Optional): OpenBoxes will auto-pull the Expiration Date associated with the entered Lot Number from the system.
-
Bin Location (Column F): Enter the Bin Location for the Lot Number that you want to pick.
If the same Lot Number is in multiple Bin Locations, enter the Bin Location in the excel file.
If stock is in Receiving, Default, or Hold Bins, OpenBoxes auto-select the Bin location. See the yellow box below to see how OpenBoxes makes selections:
Important information on how OpenBoxes matches Lot # to Bin Locations
- OpenBoxes will ignore Lot Numbers placed in Hold Bins.
- If the same Lot Number is in multiple Receiving Bins, OpenBoxes will pick the Receiving Bin with the fewest items.
- If all stock is in Default Bin, OpenBoxes will pick from the Default Bin.
- If you want to pick multiple Lot Numbers, add a new row, Copy and Paste the ID, Code, and Name into the new row. Add the desired Lot #, Expiration Date, and Bin Location in the new row.
- Go back to OpenBoxes, Click on Import Template. If the imported file has valid Lot # and Bin Locations, you will see your picked selections on the Pick Page.

Possible Errors during Pick Import
When Importing Pick selections of a shipment, you may encounter the following errors:
- If you Import template consists of lines that do not have valid entry of Lot or Bin Location:
- You will also see a validation message, "The stock entry you picked at row X does not exist. Please review pick."
- The specific lines with errors will be highlighted in Red on the Pick Page.
- You entered a Lot # for a line but not a Bin Location. The Lot # you selected is present in multiple Bin Locations (Not Receiving, Default, or Hold Bins).
- You will see a validation message, "Product x has stock in multiple bins. Please indicate the bin to pick from."
- The quantity on Quantity to Pick does not match the quantity finalized on the Edit Page.
- In this case, Pick import for the lines with this error will fail with this validation message, "The quantity you select for item XX is different to the expected revised quantity. Please review pick".
- The Failed lines will be highlighted in Red on the Pick page.
- The Lot# or Bin Location you added on the Import file does not have products available.
- In this case, the import will fail for the lines where stock of the designated information is not available with this validation message, "The stock entry you selected at row X isn’t available. Please review pick.”
- The failed lines will be highlighted in Red on the Pick page.
I want OpenBoxes to auto-pick for a shipment. What do I do?
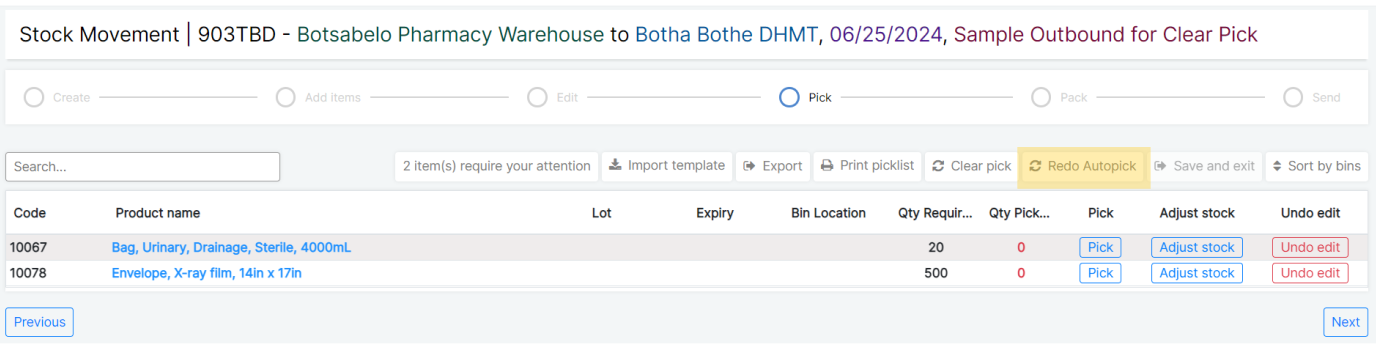
If you have cleared the auto-pick, but need OpenBoxes to auto-pick again, simply click on Redo Autopick.
This will prompt OpenBoxes to select the first expiring Lot number.
Important to know regarding Updating Pick
- Once you clear pick, the picked Lot # become unreserved and are available for others to add in their shipments.
-
After you Clear Pick, make sure to complete Pick for all items in the shipment before leaving the page or closing your browser.
Leaving lines not picked will cause issues with product availability.
Complete Pick for ALL lines and proceed to the Send Page immediately.