Receiving
Find Shipment to Receive
In order to receive a shipment, you must first identify a shipment that needs to be received. You can see all of the available shipments by clicking Inbound > List Inbound Stock Movements.

Incoming stock movements can have 4 different Receipt Statuses:
- Pending
- Shipped
- Partial Received
- Received
Only shipments with status "Shipped' or "Partial Received" can be received.
"Pending" shipments have not been sent yet, and you can't receive a shipment that hasn’t even been sent.
"Received" shipments are already fully received, so you can't receive them twice.
View instructions for Partial Receiving here. For now, you can find all of the shipped shipments by filtering for receipt status "shipped."
Once you find the shipment you want to receive, click on the identifier or the name to enter the shipment view screen:

Receive the Shipment
On the shipment view screen, you can see the packing list for the shipment. You can also see the shipment status in green in the upper right hand corner.
Once you are sure you have the correct shipment, click the Receive button on the upper left.

This will open up a new page where you can enter your receipt:

On this page, you can do the following:
-
RECEIVING NOW: Enter the qty that you are receiving of each item
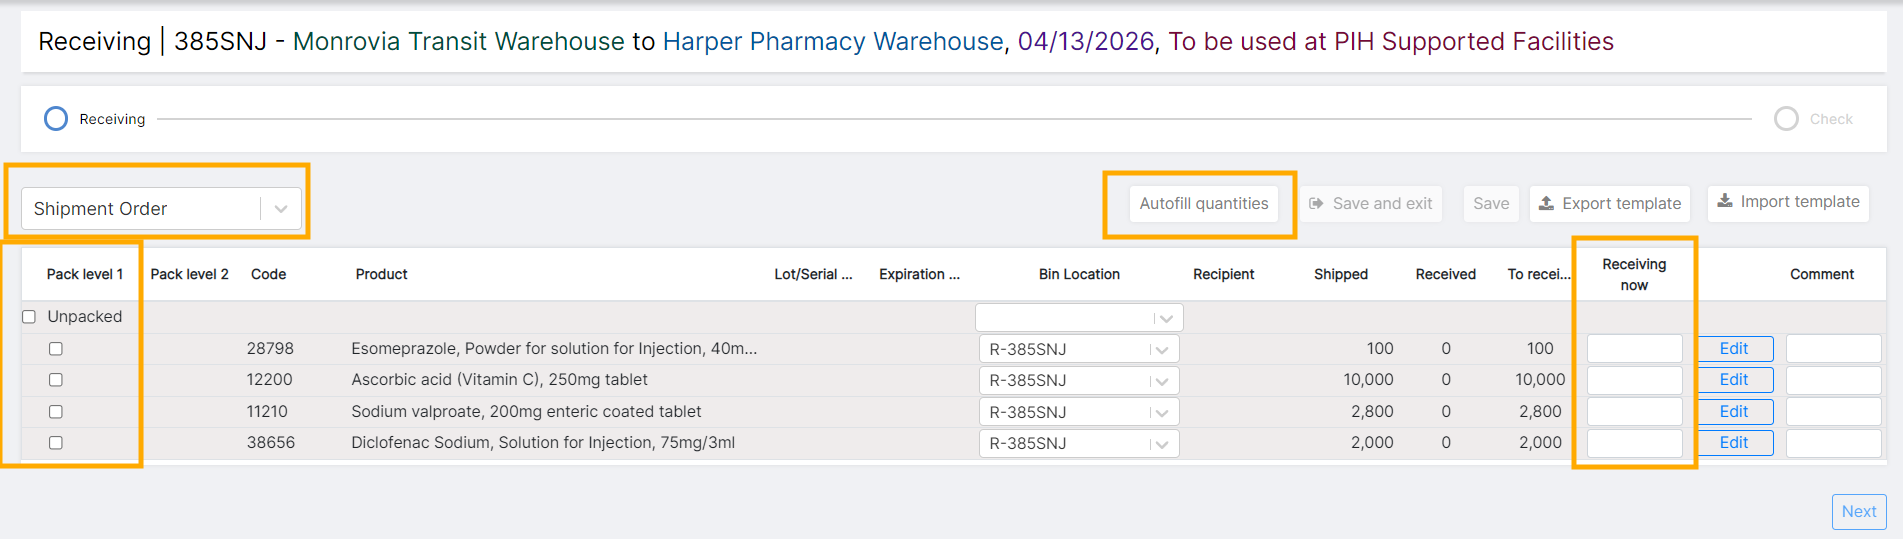
- Filter by Shipment Order or Alphabetical Order: You can choose to view the shipment items in the order that the shipment was shipped or by alphabetical order.
- Autofill Quantities: The autofill quantities button will automatically fill in the receiving now column with the qty remaining to receive. This button is useful if you received the exact quantities expected. You can then edit the qty filled in if 1 or 2 items were not received in the full qty
- Use the checkboxes to fill in quantities by pallet or line. Clicking the check box on the far left of the screen will autofill the expected qty for that line. Clicking the checkbox for the associated pallet will autofill the expected qty for all lines in that pallet. This can be useful if there are too many problems with the shipment to autofill all quantities, but you want to move a little quicker
- Manually enter the receiving now qty for each line: This is the best option if there were many discrepancies between the shipment and the receipt
-
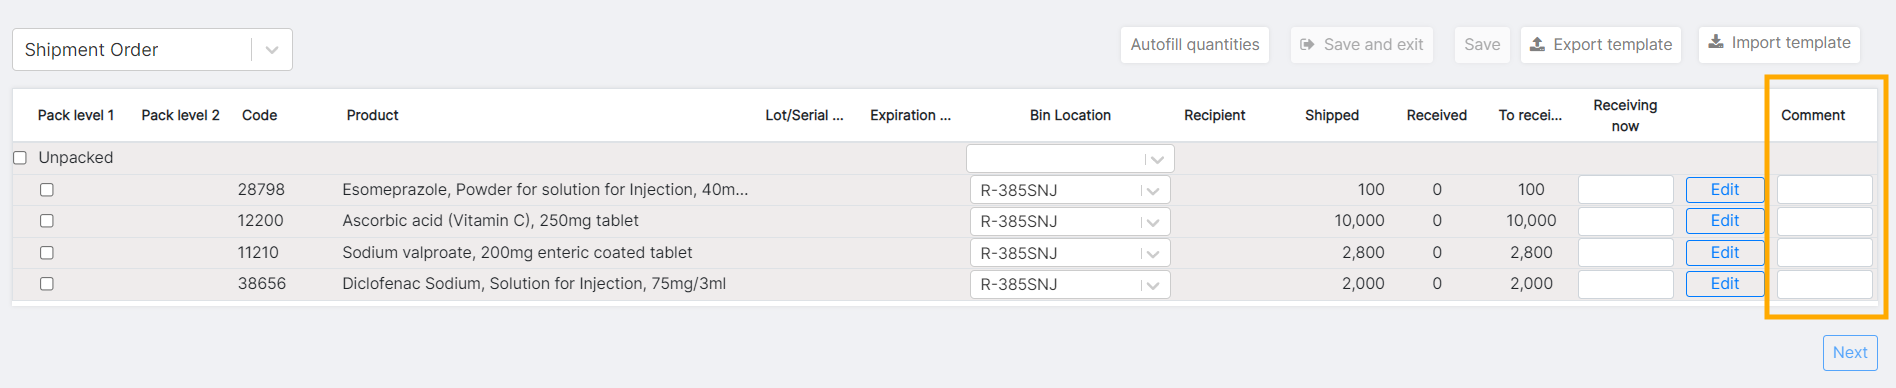
Add a comment on selected lines. For any line where there was a difference in qty shipped v received, it is wise to add a comment explaining what might have happened. Comments can also be included on any other line, but are not required for any line.
-
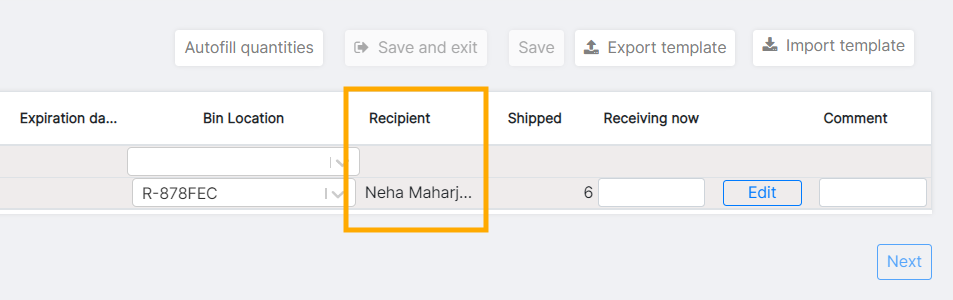
View Recipients. Under the Recipient column, you can view the recipients for each line item, as entered during the shipment. Users cannot update or add a Recipient during Receiving process.
Once the receipt is complete, the designated Recipient receives an email notifying about the receipt.
-
Edit a bin location. If you do not see a bin location column on your page, that is because your location does not have bin tracking enabled. You can skip this part!
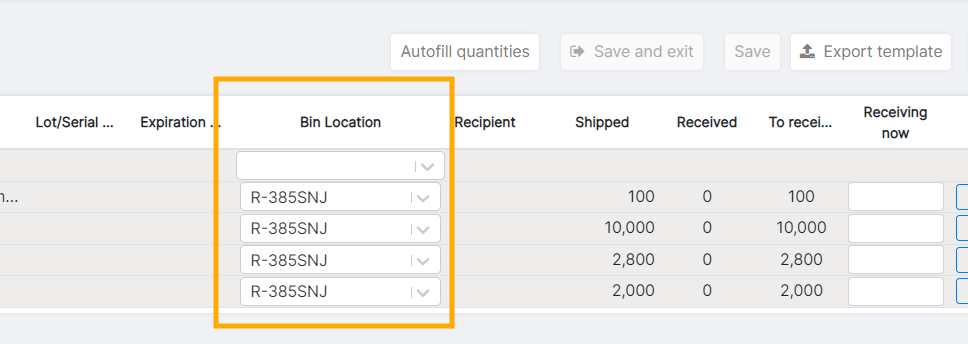
If you do have bin tracking, the bin location field will be pre-filled with a receiving bin. Leave as is to move the items into receiving, and move them out later through the putaway process. if you want to skip the putaway and move items straight into their final bins, select the bin location you moved them to from the dropdown. You cannot put away one receipt line in two different bins using the receiving feature - to do this use the putaway process.
- Edit a lot number or expiry date. If you received a different lot number or expiry date than is shown in the packing list, you can change the lot received by clicking the edit button. This will bring up a modal where you can change the lot or expiry date of the line. You can also split the quantity between two lots by clicking add line:


Once you have reviewed every line and made all necessary edits, press next to go to the Review Page:

This page gives you the opportunity to check your work. In the Receiving Now column, it shows you how much you have entered to receive.
The Remaining column shows the difference between what was shipped and what you are receiving. This column provides a useful check to help you identify any problems with your receipt.
- If it is red and the number is positive, you have received less than was shipped.
- If it is red and the number is negative, you have received more than was shipped.
This is what you would expect to see if there were discrepancies between what the shipper said they shipped and what you received, but it should prompt you to double-check before finalizing the receipt.
If you do find any errors in your receipt, you can press Back to edit to return to the previous screen and change the numbers.
Once you have verified all of your work, check the Delivered On date. This date defaults to the day you are receiving - you can update it if you are entering a receipt that was done before today.
Finally, click Receive Shipment to update the shipment status to “Received” and enter the items into inventory.
Upon receipt, you will be directed back to the view shipment page, where the new shipment status is received. You can also see the items that you received or canceled reflected on the packing list tab, and on the receipts tab.

Documents
If you would like to print out a Goods Receipt Note, you can do so on the Documents tab:

This will provide a printable copy of the receipt that can be signed and kept on file as needed:

Receipt Notification Email
Once the Receipt is complete, the designated Recipients receive an email with Receipt details:
- Shipment Number
- Origin
- Destination
- Received by
- Product information (only the ones where the person was designated as a Recipient)
- Goods Receipt Note attached (with ALL the products received)
