Manage Locations
IN THIS ARTICLE
It is highly recommended that users review this document before creating new locations: Location Types and Supported Activities. This will get you introduced to the different location types available in OpenBoxes and also the different activities supported by these available locations.
Different Location Types
Locations are one of the most important building blocks of OpenBoxes. They are used to track where stock came from, where it is, and where it went. There are several different types of locations in Openboxes as mentioned below. You can also view this document for a detailed description of the different location types and the activities these locations support.
-
Depot: A depot is a location that can manage stock within Openboxes. Any location that you can enter and see the dashboard is a depot. All of the location in the location chooser are depots.
You should create a location as a depot if, and only if, you have a user who will be actively managing the inventory in that depot. If you will not be managing inventory in that location in OpenBoxes, choose one of the following location types.

-
Supplier: A supplier is a location that exists only to send stock to other locations. Suppliers do not have a dashboard or inventory. You should create a supplier location to reflect every location that is sending stock to your warehouses, but is not a depot.
Usually, a supplier in OpenBoxes is also a supplier in real life, for example Amazon.com. However, any location that is sending stock but not managing stock in Openboxes can also be a "supplier" in the system.
- Dispensary/Ward/Pharmacy: These locations are essentially interchangeable. All exist only to receive stock from Depots. Any location to which you will be sending stock, but not actively receiving or managing inventory in Openboxes, should be created as a ward, dispensary, or pharmacy

View and Search Locations
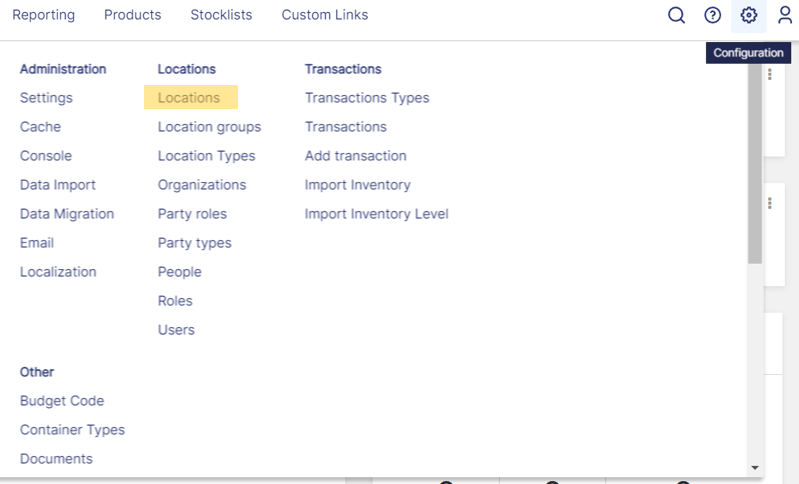
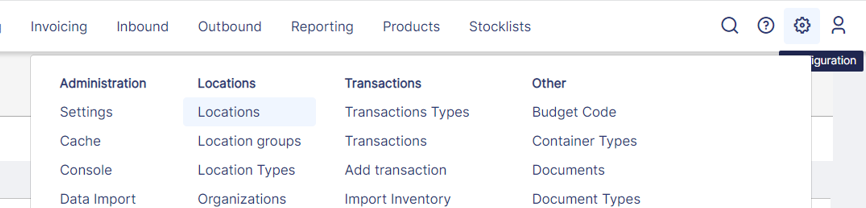
- To access the location list page, hover over Configuration and click “locations”.
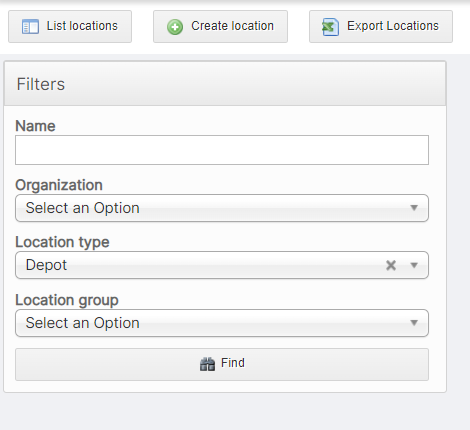
- A new screen will appears that lists all of the locations in the system.

- On the right-hand Filters box, you can search for a location by name, or filter by location type or location group. You can also click the “export locations” button to see the full list of locations in Excel.
-
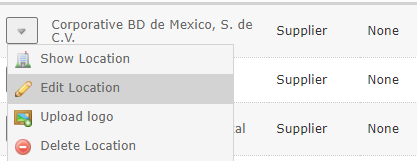
To see more information about a particular location, click on the carrot next to the name and press “Edit location”

Location Carrot Dropdown - This will bring you to a page with details about the location.

- Each of the tabs on this screen shows a list of objects associated with the location. For example, the Bin Location tab shows all the bin locations created for this location.
Create Locations
- Hover over Configuration and click “locations”.
- On the new screen that appears, click on “Create location”.

- The "New Location" screen will appear where you can enter location information. There are multiple tabs to enter different types of information about the location. First, let's fill the Location tab.
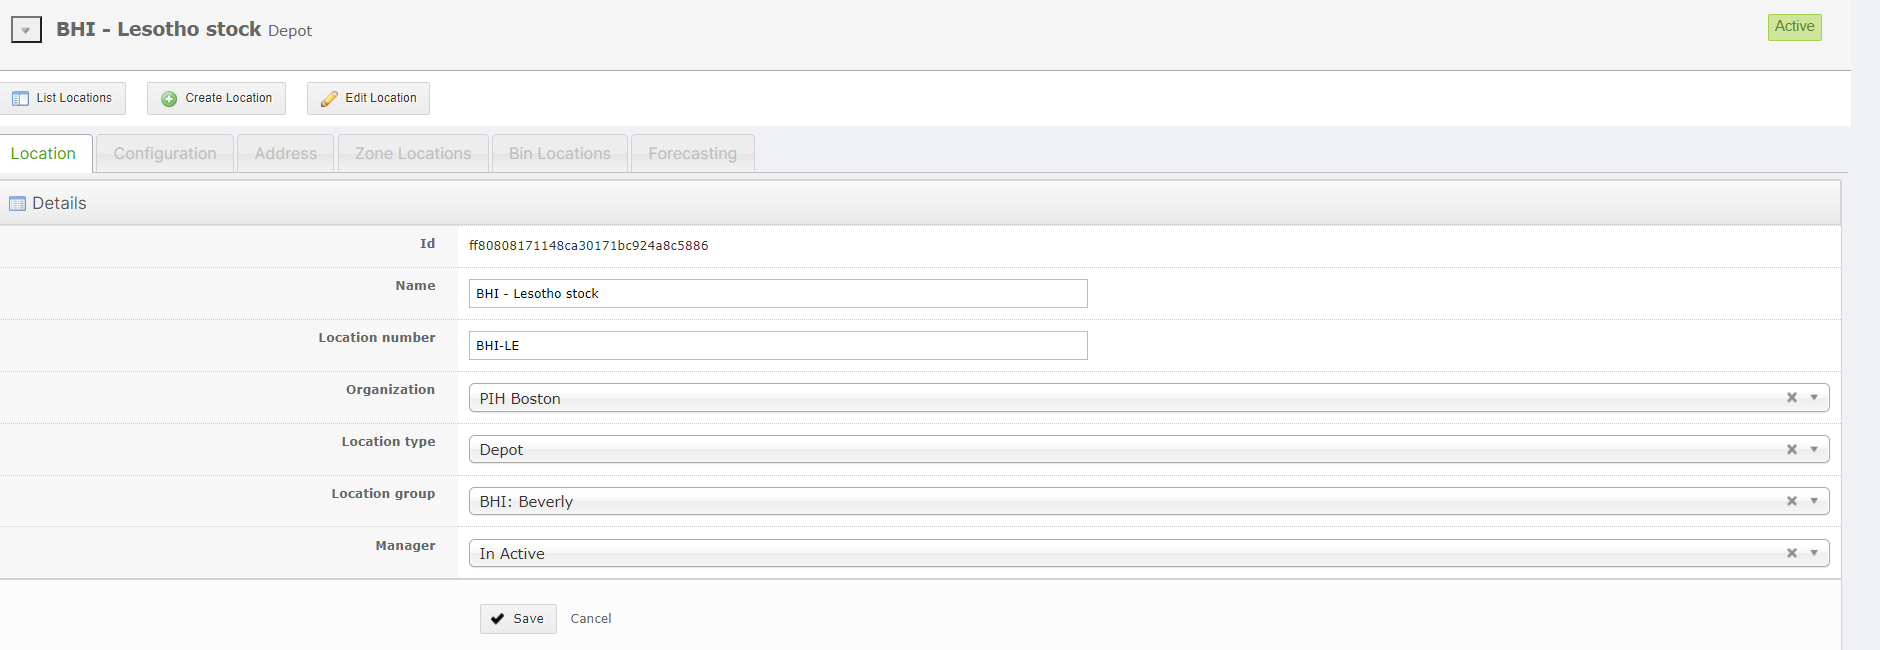
Location Tab:
- Name: Write in the name of the new location
- Location Number (Optional): Type in a nickname or acronym for this location.
- Organization: Select an existing organization from the dropdown that this location would fall under.
- Location Type: Choose Depot, Supplier, Ward, Dispensary, or Pharmacy.
- Location group: Choose which location group you want it to fall under. Learn more about location groups.
-
Manager (Optional): Choose an OpenBoxes user to act as manager of the location.

New Location Fields - Click Save to create the location. But don’t stop there! You need to fill out the other tabs!

Configuration Tab:
After entering information in the Location tab, switch to the Configuration tab to assign supported activities for the location.

-
Active: Automatically checked. Only uncheck this if you want the location to be hidden to users.
Background color/ Foreground color (Optional): allows you to edit the color that appears on the screen.
Supported activities:
Based on the Location Type you chose under the Locations tab, OpenBoxes will apply some default settings to the location. If you wish to change the default settings, simply uncheck the "Use Default Settings" box and add/remove supported activities. You may need to updated the activities especially for Depot locations.
Here are some tips if you wish for specific features for your location:
- Turn off bin location tracking: Remove “Pick Stock” and “Putaway Stock” from the supported activities to turn off bin location tracking in this depot
- Turn on partial receiving: Add partial receiving to the supported activities in your depot if you want to be able to receive a shipment in part and then receive the rest later. The default is that shipments must be received all at once.
- Turn off inventory tracking: If you want a location to be recognized as a depot for filtering purposes, but not appear as a location that users can log into, remove “manage inventory” from the supported activities.
- Turn on Autosave feature: If you want to use autosave feature for your location, choose "Autosave" from the supported activities dropdown.
Address Tab:
You can add location address if you want. This is optional.
Enter the address for the location in this tab. Administrators can configure purchase order printouts and shipping templates to use this address.
Zone Locations:
This tab is only for use in depots with bin tracking enabled. Use it to add or remove zone locations within your depot. See this document on how to add Zone Locations: Managing Bin and Zone Locations.
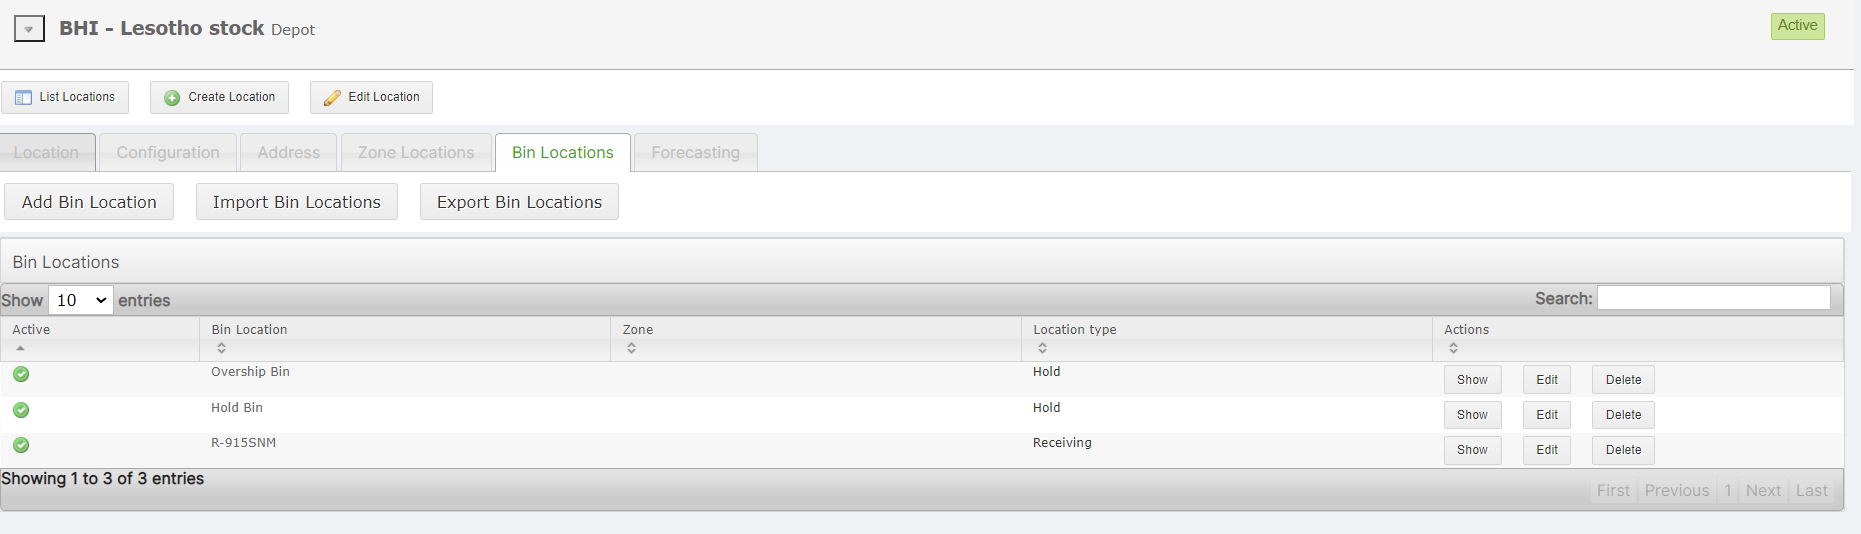
Bin Locations:
This tab is only for use in depots with bin tracking enabled. Bins could be storage locations within bigger zone locations. Use it to add or remove bin locations within your depot. See more in Managing Bin and Zone Locations.
Once you have made all of your updates, click Save to register your changes.
Add a Logo:
After you have created you location, you can add a logo that will show in the upper right hand corner of the screen when you log in. You may have noticed that many of the screenshots show a customized location logo like the below:

- You can upload a custom logo to your location by going to the location list page. Find the location you want to add the logo to. Click the carrot net to the name, and choose “upload logo.”
- Choose a file from your computer and press upload. The file size must be 40x40 to fit perfectly into a square.

- When you log in to that location, you will see your logo in the top left corner.
Edit Location
- From the location list screen, you can edit any location by either clicking the name of the location, or clicking the carrot next to the name and choosing “edit “location”
- From here, you will be redirected to the same set of screens as you saw during the location creation process.
- Edit the fields you want to change and press Save.
Delete or Deactivate
- Delete: To delete a location, find the location on the shipment list page. Press the carrot next to the name and choose “Delete Location.”
Please note that if your location has ever been involved in a transaction, it cannot be deleted. This prevents users from accidentally breaking the database by deleting information that is being used in other places in the system. So then what do you do if you can’t delete a location?
- Deactivate a location: Deactivating a location makes it unavailable for users to view or select while they are working on OpenBoxes. The location still exists, and may appear in old data from before it was deactivated, but it can’t be seen or used in transfers moving forward. Deactivate locations can be reactivated at any time.
- To deactivate a location, go back to the location Details page. Open the Configurations tab.
-
Uncheck the "active" box and press Save.

Configurations Tab in Location Details Page
