Import Actual Ready Date and Recipient on Multiple Different PO(s)
IN THIS ARTICLE
Permission
To perform this import, users need ADMIN permissions. Please contact you Administration if you need access to this import.
When to use this Import?
Use this Import if you have to update Actual Ready Date across different Purchase Orders.
Use this import if you have to update Recipient across different Purchase Orders.
What is Actual Ready Date?
In OpenBoxes, users can track two different types of dates in the Purchase Orders (PO): Estimated Ready Date and Actual Ready Date. The Estimated Ready Date is generally provided by vendors during the quotation process and entered during the PO creation. However, once the order is placed and vendor sends the Order Confirmation, they may offer an updated Ready Date. This Actual Ready Date is important to track lead times.
When the vendor provides updated Ready Date, users may have to update this for multiple line items in multiple POs. In this scenario, users can import the Actual Ready Date instead.
Import Actual Ready Date
Users need Admin permissions to access the Import Page.
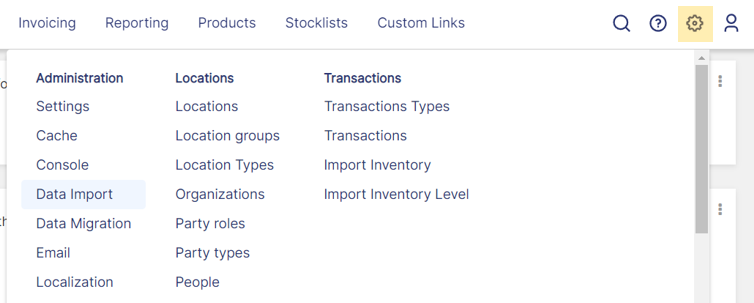
- On the Top Menu Bar, Click on Configuration > Data Import.
-
Under the Import options, Download Template for PO Actual Ready Date and Recipient

- Enable Editing on the downloaded Template. Enter the following data into the template.
- Order Item ID: Not Needed, unless you are entering multiple lines for the same PO with the same Produce Code.
- Order Number: Enter the full PO Number.
- Product Code: Enter the Product Code. OpenBoxes will match with a product using this data.
- Product Name: Enter the Product Name.
- Actual Ready Date: Enter the Date in the format MM/DD/YYYY.
- The Actual Ready Date needs to be in TEXT format.
-
You can select the entire column, then change the format to TEXT from GENERAL.

Changing Column Format to Text - OR Add an apostrophe (') before the date. For example: '02/22/2025.
-

Template Screenshot with Sample Data
-
- The Actual Ready Date needs to be in TEXT format.
- Recipient: Enter the Recipient name as it appears in Openboxes. You can also enter their email address.
- Save the file.
- Go back to the Data Import page in OB. Choose the file you prepared for import. Make sure the "PO Actual Ready Date" Import type has been selected. Click Upload.
-
On the Next page, review all the data set to be imported.

Import Review Page If everything looks good, click on Finish, otherwise, click on Back to re-upload template file.
-
In the PO, under Item Details tab, you will see the updated Actual Ready Date.

Actual Ready Date under the Item Details Tab


